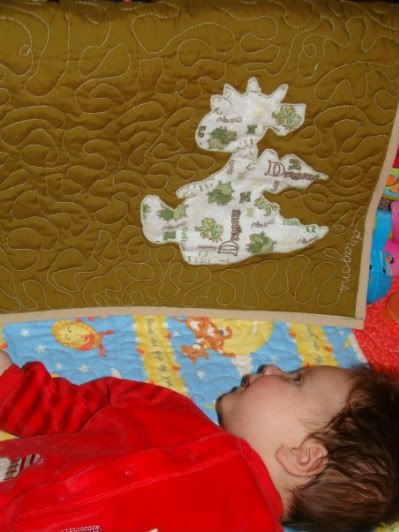
I'm sorry, I can't help but post some shameless extra pictures of Thomas and the blankie I made him. I love that I have a tiny little fan!! I rarely get pictures of people using or holding up what I made for them, so it's totally cool to see it here.
Vanessa tells me that he focuses on the dragon applique I put on it all the time. I love this kid, ain't he perfect? He's going to have his fathers sense of humour and his mothers graceful kindness. Luv him already.
Monday, December 21, 2009
Wednesday, December 16, 2009
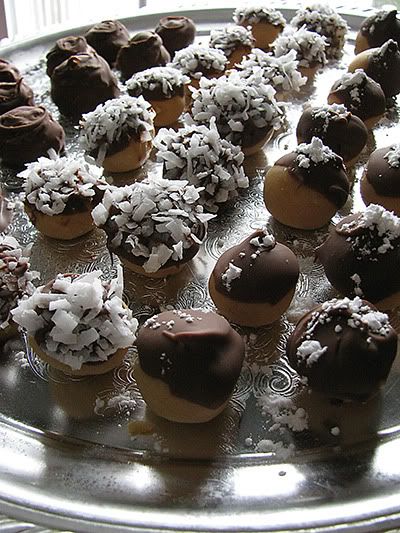
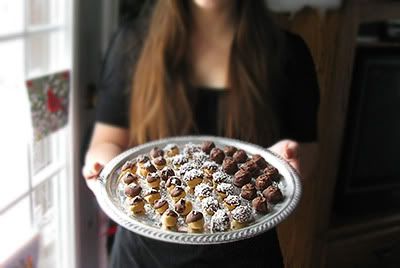
Peanutbutter Balls
Mmmmmm, these are so inexpensive, so easy, but look so rich! Woot! I've included the recipe that was written, and a link to where I found it at the bottom! Try them, you'll love them!
You’ll need:
1/2 c. peanut butter
3 T. butter (or ‘margarine’) slightly softened
1 1/2 c. powdered (confectioner’s) sugar
1 c. chocolate chips (I used milk chocolate & use more if you want to cover the ‘buckeyes’ completely)
Makes 2 dozen (24) 1″ +/- round candies.
—
Combine butter and sugar (I used a fork to ‘cut’ it in, but I’m sure a hand mixer would work a LOT better/quicker)
Add peanut butter and mix to combine.
Roll mixture into balls and place on a cookie sheet (on a piece of wax paper or foil.)
Refrigerate for 30 minutes, then place in freezer for 15-30 minutes - or longer if you’ve got things to do, etc. They’ll be fine.
When you’re ready to coat them, melt the chocolate in a double boiler or microwave (you’ll have to reheat it a couple times if you use the microwave.)
If you like, dunk in coconut or sprinkle powdered sugar on top to make it pretty.
Retrieve the now hardened peanut butter balls, stick a toothpick in and dip into the chocolate - halfway or all the way, the choice is yours. Place on the same cookie sheet and continue until they’re all done. Once they’re dipped/covered, it’s back into the fridge for 15-30 minutes and then they’re ready to go devour!
Recipe From: Here
Bon Apetit! ;o)
Wednesday, November 25, 2009
Hugh got featured on Craftster!!
Tonight I was made to have to pick up my jaw from my lap as I clicked on Craftster.
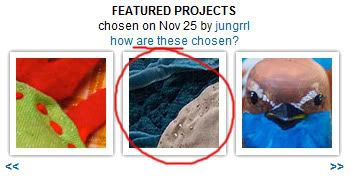
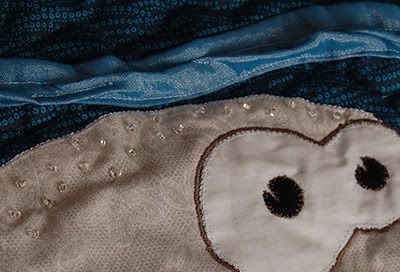
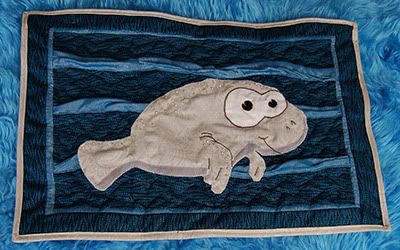
My manatee quilt that I made for RhymeswOrange, was in the featured projects section of the front page!!! Wow! I've never had any of my posts there or in the hot topics board before. This is really special to me, because I worked so darn hard on that quilt.
Featured projects usually get rotated twice a month, so he'll be up for a little bit! Scroll through the featured projects area until you see blue and gray with seed beads.
Here's the Craftster Main Page
And a link to the Post I Made
And of course their Archive Page of the set of featured projects as a whole from this set.
And for when the links change in the future, I screen Grabbed for posterity! ;o)
Monday, November 16, 2009
Hugh the Manatee - Art Quilt Swap 2
Meet Hugh,
So named by my swap partner RhymeswOrange who received him this week! :)
I made him for the art quilt swap. This was her list of themes:
1. surrealist artists
2. skulls
3. "V-J Day in Times Square" photograph
4. cardinals
5. manatees
Manatees?! How irresistibly awesome!!! So I went to the drawing board. I wanted to do something cartoon-y. Something that really popped. I wanted to have elements of texture. I wanted it to have a subtle sparkle like in water.
I used applique for the manatee body. it was done in a subtle patterned fabric. RhymeswOrange said she likes fabric that registers as a solid colour to the eye. I used a blue bubble fabric for the background, and for the waves I used a stiff lightweight sparkly fabric that holds shape well when ironed for the waves. I twisted it and sewed it into odd shapes to give it movement. I hand sewed on little seed beads to give it that sunny gleam! The quilting was done with invisible thread in the shape of waves.
I also learned how to make my own bias tape for this project. I wanted it to match. To hang it there are spaces for a rod to go across the back. There are two grommets in the rope to hang it so that it can go on hooks. Makes it hang square. :)
So there you have Hugh! The lovable bubble blower from the deep sea! ;)
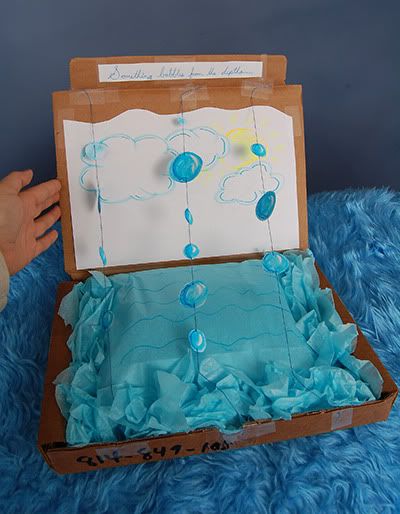
Here's a snap of how I packaged him. When you open the lid to the box you see strings of bubbles come up!
Text says "Something bubbles from the depths..."
Monday, November 2, 2009
Update: Baby Stuff for Vanessa
I finally got to see Vanessa's baby boy with one of the gifts I made for him. The dragon blanket is in the middle with the tan trim. :o)
Introducing Thomas, the cutest lil' dude you ever did see!
Tuesday, October 27, 2009
Ugly Gross Looking Drawr Thing, to Cute Modern Wall Shelf!
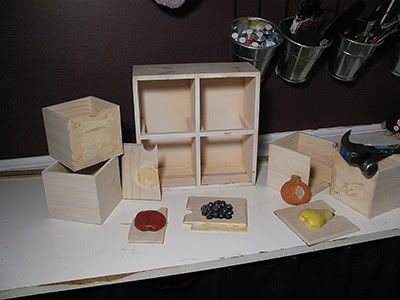
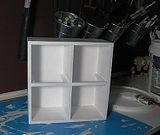
I got this used at Goodwill and thought it had potential. These are the only before pictures I have:
*Shudder* They were dusty and bland looking. I had already started beating the ugly little blighter up. It took a lot of effort to rip off those fruits! All of them looked nasty.
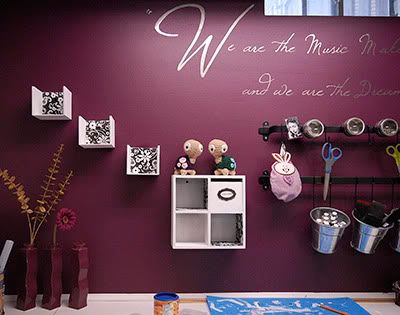
Once I pulled everything apart to my satisfaction, I primed and painted it. I let it dry, and then I used scrapbook papers to add a little flare! I decided I didn't want to use all of the drawers as drawers, some I wanted to be their own little shelves!
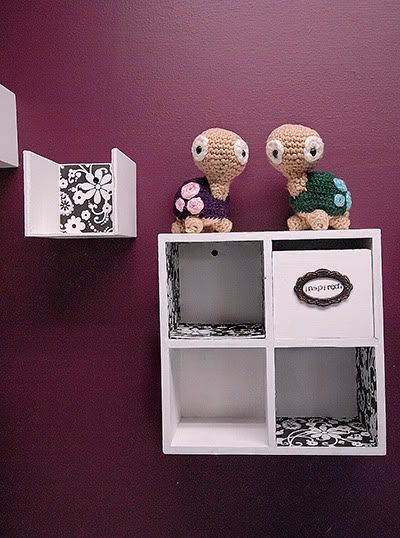
Et voila! They hold little sewing notions, nick-nacks (shout out to Perlabella from craftster for those Turtles!) and other varying items. I gave it a clean look and a fresh use.
Closer...
And Closer...
Are you inspired? ;o)
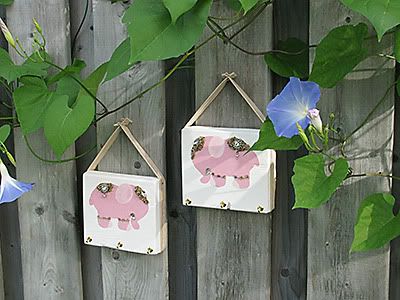
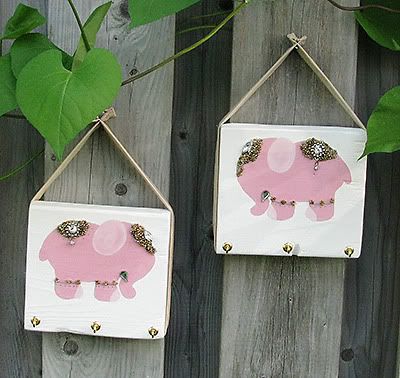
Elephant Jewelry Holder - Tutorial
Hello all! I received very nice feedback about the jewelry holder, so I've decided to post a tutorial so that you can all make your own! :o)
Supplies:
-Wood Block
-Sand Paper
-Screw in Hooks (Can be found at hardware stores)
-Paint
-Beads
-Glue Gun + Glue Sticks
-Ribbon, or fabric to make your own (sturdier)
-finishing nails.
Note:
Any smaller thumbnails can be clicked to be viewed in standard size in a new window.
Read all directions from start to finish before beginning your own set. If you are making more than one block like I did, do each step to each block as you go rather than finishing off one block at a time. It's way faster to do them together!
Hoh-kay! Here we go!
Step One:
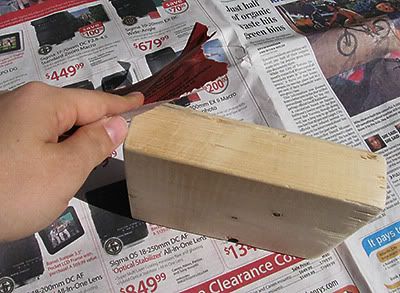
Sand your block of wood thoroughly.
Step Two:
Paint a base coat on the wood using primer or acrylic paint. Let dry. Paint your block the background colour of your choice, or if you're using just acrylic paints just do a second coat. For mine, I used two layers of white acrylic paint. Let this dry thoroughly.
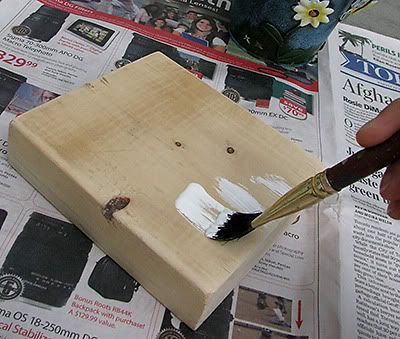
Step Three:
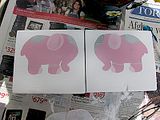
Trace an outline of your elephant in pencil very lightly. This will guide you where to paint.
Step Four:
Paint the body of the elephant using acrylics. Let it dry.
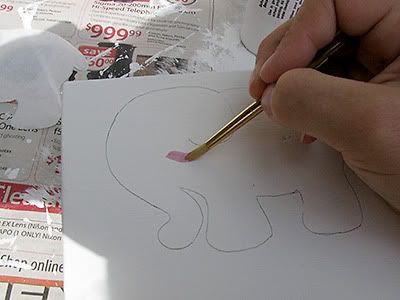
Step Five:
Add dimension by using highlights and low lights of the same tone. Add details if you wish. Let it dry between each layer of paint.
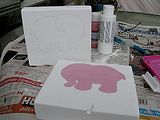
INTERMISSION - Paint drying! Make a snack, fold your underwear, give your kitty a belly rub. Vhat-ehvah!
Step Six:
Okay, so we're leaving the blocks alone for a bit. We'll focus on what will be holding your blocks up. If you are using ribbon, pick a strong type. Don't use anything flimsy or too thin.
If you are sewing your own, pick a fabric and cut it to a width 4X the finished size. Cut the length based on the size of your block. Make it a minimum of 25cm longer than the perimeter (so that you have extra length to hang it). Press in the raw edges to the middle, then fold in half so they are trapped inside. Stitch down to finish. Use a decorative stitch like I did if you're feeling fancy!
Step Seven:
Place your ribbon around your block to decide how long you want it. Stitch ribbon ends together at the top once you have settled on a length. Then set aside.
Step Eight:
Now that your paint is completely dried, heat up your glue gun. Glue down little beads or embellishments to make your design pop! I use itty bitty seed-beads, which can be a real pain and take a long time. But they look fabulous in the end! I also used a few extra gems that can be found at any standard craft store (but I got mine off of shoes that had no match! haha!)
Step Nine:
Now that your beads are firmly in spot, we're going to attach the ribbon. Line it up carefully, and before gluing try leaning it on the wall. You'll notice my ribbon isn't centre - it's lined up at the back. This was important because for me it was more balanced in this spot. So it's worth saying again, check before affixing! Once steady, use the glue gun to hold 'er down.
Step Ten:
Use those finishing nails near the top for extra stability. One on each side of the block, right through the ribbon.
Step Eleven:
Screw in your hooks. I used three on each, you can do whatever you like! Consider the jewelry that you'll be hanging and how much space between you need.
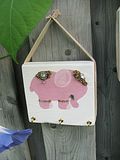
Tadaaaaa! You're done! Yay! Now you're ready to hang them up and to keep those necklaces tangle free and organized! Your elephants will feel so pretty! ;o)
Supplies:
-Wood Block
-Sand Paper
-Screw in Hooks (Can be found at hardware stores)
-Paint
-Beads
-Glue Gun + Glue Sticks
-Ribbon, or fabric to make your own (sturdier)
-finishing nails.
Note:
Any smaller thumbnails can be clicked to be viewed in standard size in a new window.
Read all directions from start to finish before beginning your own set. If you are making more than one block like I did, do each step to each block as you go rather than finishing off one block at a time. It's way faster to do them together!
Hoh-kay! Here we go!
Step One:
Sand your block of wood thoroughly.
Step Two:
Paint a base coat on the wood using primer or acrylic paint. Let dry. Paint your block the background colour of your choice, or if you're using just acrylic paints just do a second coat. For mine, I used two layers of white acrylic paint. Let this dry thoroughly.
Step Three:
Trace an outline of your elephant in pencil very lightly. This will guide you where to paint.
Step Four:
Paint the body of the elephant using acrylics. Let it dry.
Step Five:
Add dimension by using highlights and low lights of the same tone. Add details if you wish. Let it dry between each layer of paint.
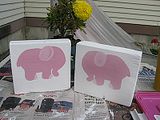
INTERMISSION - Paint drying! Make a snack, fold your underwear, give your kitty a belly rub. Vhat-ehvah!
Step Six:
Okay, so we're leaving the blocks alone for a bit. We'll focus on what will be holding your blocks up. If you are using ribbon, pick a strong type. Don't use anything flimsy or too thin.
If you are sewing your own, pick a fabric and cut it to a width 4X the finished size. Cut the length based on the size of your block. Make it a minimum of 25cm longer than the perimeter (so that you have extra length to hang it). Press in the raw edges to the middle, then fold in half so they are trapped inside. Stitch down to finish. Use a decorative stitch like I did if you're feeling fancy!
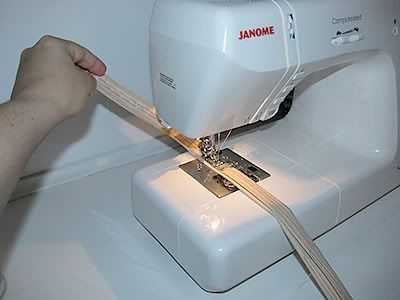
Step Seven:
Place your ribbon around your block to decide how long you want it. Stitch ribbon ends together at the top once you have settled on a length. Then set aside.
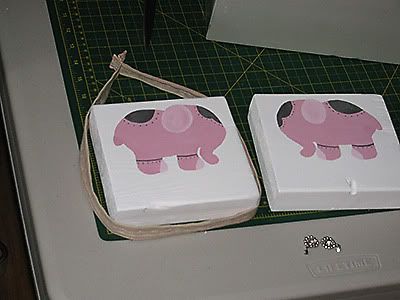
Step Eight:
Now that your paint is completely dried, heat up your glue gun. Glue down little beads or embellishments to make your design pop! I use itty bitty seed-beads, which can be a real pain and take a long time. But they look fabulous in the end! I also used a few extra gems that can be found at any standard craft store (but I got mine off of shoes that had no match! haha!)
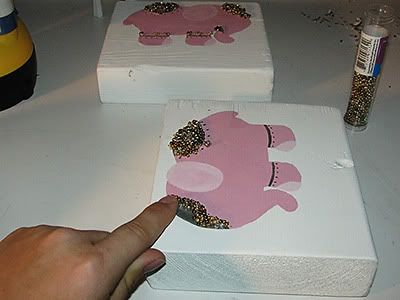
Step Nine:
Now that your beads are firmly in spot, we're going to attach the ribbon. Line it up carefully, and before gluing try leaning it on the wall. You'll notice my ribbon isn't centre - it's lined up at the back. This was important because for me it was more balanced in this spot. So it's worth saying again, check before affixing! Once steady, use the glue gun to hold 'er down.
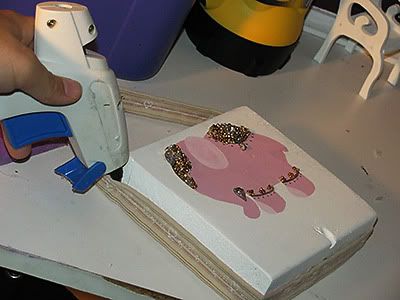
Step Ten:
Use those finishing nails near the top for extra stability. One on each side of the block, right through the ribbon.
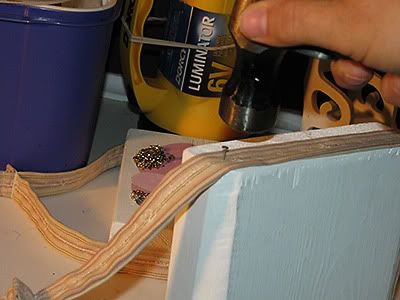
Step Eleven:
Screw in your hooks. I used three on each, you can do whatever you like! Consider the jewelry that you'll be hanging and how much space between you need.
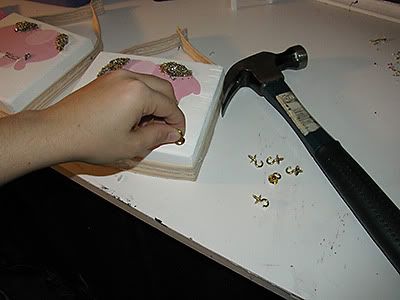
Tadaaaaa! You're done! Yay! Now you're ready to hang them up and to keep those necklaces tangle free and organized! Your elephants will feel so pretty! ;o)
Friday, October 23, 2009
IYP Swap - Jenicat
This swap was from the summer. I made Jenicat two dresses and two jewelry hangers. She made me a necklace and a fabric bowl, and also bought me a little wine bottle carrier (which is great for taking my water bottle to the gym!)
Here's what I sent Jenicat:
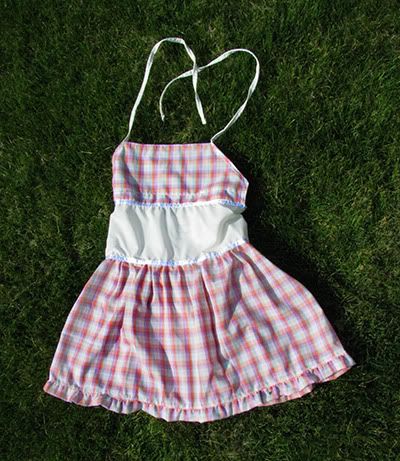
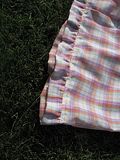
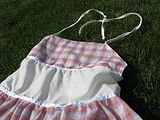
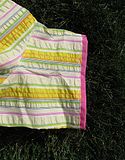
A dress for her two year old. I call it 'the picnic dress'!
Details: I created a ruffled bottom with the same fabric to give it a girly flounce. The top features two rows of satin ribbons, and also a tie around the neck. I neglected to get a shot of the back where I did a square of elastic bunching :o( Oops.
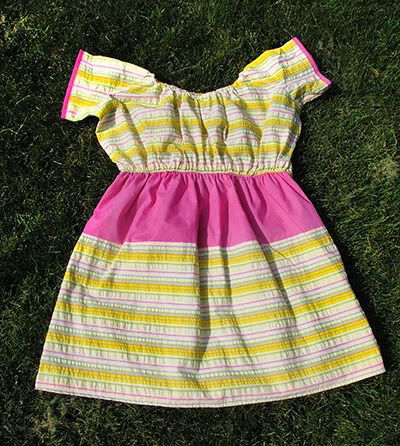
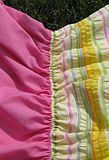
A dress for her five year old. This one I call 'Pink Soda'. hehe!
Details: I used elastic to ruche the waist, and at the sleeve I folded a thin layer of the pink fabric over to add a slight pop of colour and sewed it to the under-side of the hem using a decorative stitch.
I also made her a set of elephant jewelry hangers. I'll do a separate post on them with more details, and a tutorial! :oD Yay!
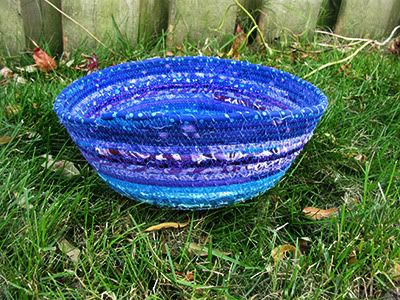
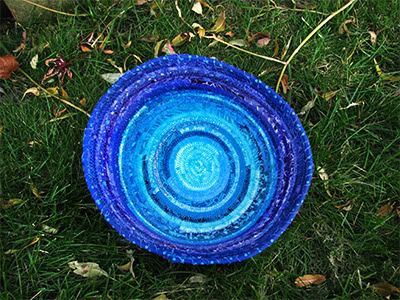
Here are the items Jenicat made me. The coolest thing EVAH!!! She makes fabric bowls! These are really cool. I actually approached Jenicat because I've seen her talents and wanted one so bad. She was really awesome and said yes! (obviously since I'm posting this!)
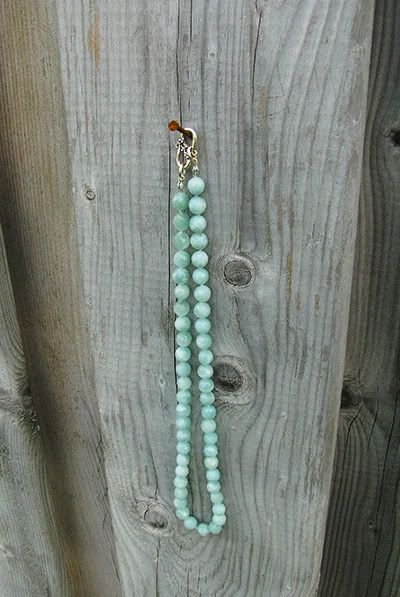
She also made me a really nice necklace. And even though every swap I have always said I don't need any more... secretly I love them.
Jenicat had commented that she felt spoiled at what I sent. Maybe I mis-interpreted sizings, or maybe I forgot what sizes we agreed upon. Maybe I just like her that much. Either way, I don't want her to feel bad that my items ended up being bigger in size, because I know we were equal in the love we put into them. I can see that these are quality crafts she made me, and I will treasure them. I would swap again with you anytime Jeni, thanks for being awesome.
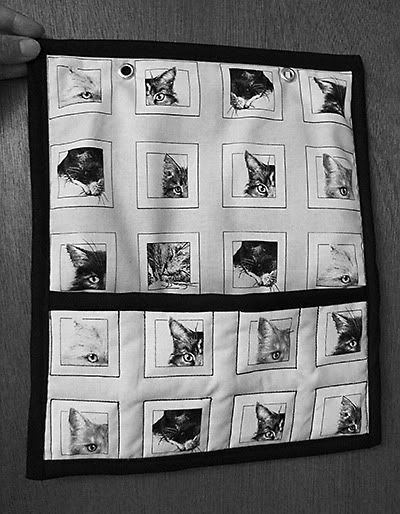
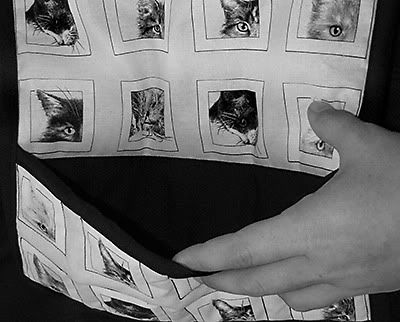
Quilted Mail Sorter
I made this for my mum, it was supposed to be a Christmas present. I just suck at waiting. I am always so excited when I make presents for people. I went upstairs and gave it to her the second I finished.
Ahhhh well, she was thrilled and that's the point. She uses it to hold note pads for the phone.
It's lined on the inside with black, and the edges were done with black bias tape.
PS: The fabric itself is black and white, so you're not missing out on anything. The pics of it look better desaturated so the wood in the background isn't distracting.
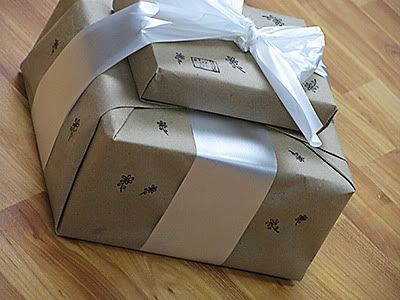
Custom Gift Wrapping
I enjoy stamps now. I have officially fallen into their allure.
So fun. So pretty. So many uses.
Here's a gift I wrapped with ordinary postage paper. I spruced it up with a ribbon and flower stamps. I actually really like wrapping presents. I think the art of beautiful wrapping has been lost in our society. We all use those bags from the dollar store now...
So fun. So pretty. So many uses.
Here's a gift I wrapped with ordinary postage paper. I spruced it up with a ribbon and flower stamps. I actually really like wrapping presents. I think the art of beautiful wrapping has been lost in our society. We all use those bags from the dollar store now...
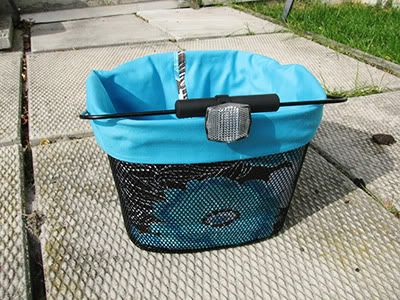
Bike Basket Liner
I used to have a milk crate on the back of my bike. It served me just fine for a while but it started slipping off. I haven't been carrying around as much on my bike lately so I decided to get a basket for the front.
Well, it was blah. So I jazzed it up with a fully lined liner! Thinking of adding a pocket to throw my keys in.
Monday, August 31, 2009
Face Cloth
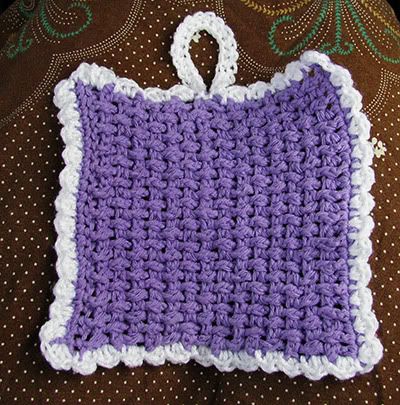
I made this really cute face cloth in basic double crochet with white scalloped edges.
The texture of bumps was done using a "front post, back post" technique. I alternated each stitch between doing back or front, instead of doing a full row of one and a full row of the other. It makes it look weaved! I saw a video tutorial and picked it up really quickly. This face cloth was my little experiment with the technique, and it scrubs the skin great. Not too rough, but really gets in to exfoliate! I bet the texture would be good as a dish cloth too.
Subscribe to:
Posts (Atom)